Adobe Premiere Pro has become the industry-standard tool for video editors worldwide, from freelancers to professional studios. For videographers in Chicago, mastering Premiere Pro is essential for turning raw footage into polished, cinematic content.
This step-by-step guide walks through the entire editing process—from importing footage to exporting the final project—while highlighting tips, techniques, and shortcuts that can save time and enhance creativity.
1. Preparing Your Project
Before editing, proper project setup ensures smooth workflow:
- Create a New Project: Open Premiere Pro and select “New Project.” Give it a descriptive name for easy reference.
- Set Project Location: Choose a storage drive with sufficient space to handle high-resolution footage.
- Sequence Settings: Match your sequence settings with your footage resolution and frame rate (e.g., 1080p at 24fps for cinematic videos).
- Organize Media: Create folders for raw footage, audio, graphics, and project files to keep everything structured.
A well-organized project prevents frustration and speeds up the editing process.
2. Importing Footage
Once your project is set, import your footage:
- Media Browser: Use Premiere Pro’s Media Browser to locate files and avoid path errors.
- Drag and Drop: Drag footage into the Project panel.
- Organize Clips: Label and bin clips by scene, shot type, or camera angle.
- Proxy Files (Optional): For 4K or high-resolution footage, use proxies to speed up editing on less powerful computers.
Properly importing and organizing clips sets the stage for efficient editing.
3. Basic Editing Workflow
Premiere Pro follows a timeline-based workflow:
- Create a Rough Cut: Place clips in sequence according to your storyboard or script.
- Trim Clips: Use the Razor tool or Trim functions to remove unwanted footage.
- Sequence Editing: Arrange clips to maintain narrative flow.
- Keyboard Shortcuts: Learn shortcuts (C for Razor, V for Selection) to speed up editing.
The rough cut focuses on structure, not polish, laying the foundation for advanced edits.
4. Working with Audio
Clear, balanced audio is crucial:
- Import Audio Tracks: Dialogue, music, and sound effects should be separated.
- Adjust Levels: Use the Audio Track Mixer to balance volumes across clips.
- Noise Reduction: Apply Adobe Audition or Premiere Pro’s built-in effects to remove hiss or background noise.
- Syncing Audio: Ensure dialogue matches video using waveform analysis or the Merge Clips feature.
Good audio enhances immersion and professionalism.
5. Color Correction and Grading
Color plays a critical role in mood and visual storytelling:
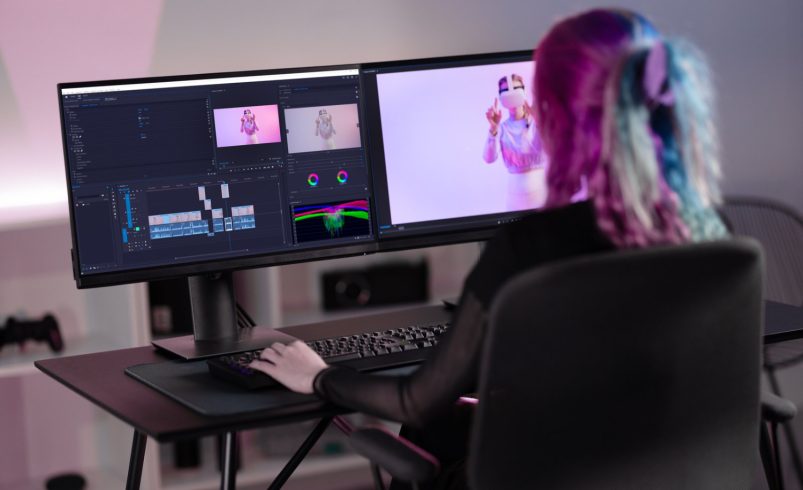
- Basic Correction: Use the Lumetri Color panel to adjust exposure, contrast, highlights, and shadows.
- White Balance: Ensure consistent tones across clips.
- Creative Grading: Apply LUTs or manually adjust hues for cinematic style.
- Scopes: Use waveform and vectorscope to verify accurate colors and exposure.
Color correction ensures footage is visually appealing, while grading enhances the mood.
6. Adding Transitions
Transitions smooth the movement between clips:
- Cut: The simplest and most effective transition for storytelling.
- Cross Dissolve: Soft blend between clips, commonly used for montages or dialogue.
- Creative Transitions: Use wipes, slides, or custom effects sparingly to enhance style.
- Adjust Timing: Ensure transitions don’t disrupt pacing or continuity.
Proper transitions maintain flow without distracting viewers.
7. Applying Effects
Premiere Pro offers a wide range of video effects:
- Keying Effects: Green screen removal with Ultra Key.
- Motion Effects: Pan, zoom, and rotation for dynamic visuals.
- Stabilization: Warp Stabilizer corrects shaky footage.
- Sharpening and Noise Reduction: Enhance clarity while maintaining natural look.
Effects should support storytelling rather than overpower it.
8. Working with Text and Graphics
Text and graphics add context and branding:
- Essential Graphics Panel: Create titles, lower thirds, and animated text.
- Motion Graphics Templates (MOGRTs): Reusable, customizable templates save time.
- Consistency: Maintain consistent font, size, and color throughout the project.
- Animation: Subtle motion can enhance visual interest without distracting.
Effective graphics complement your footage and reinforce professionalism.
9. Multi-Camera Editing
For event or multi-angle shoots, Premiere Pro supports multi-camera editing:
- Sync Clips: Use audio waveform or timecode to align multiple cameras.
- Create a Multi-Camera Sequence: Switch between angles in real time.
- Angle Editing: Cut dynamically to match pacing and emotion.
- Fine-Tuning: Adjust individual camera exposure, white balance, or audio levels.
Multi-camera editing enables dynamic, polished sequences for concerts, weddings, or corporate events.
10. Advanced Techniques
Take your editing further with advanced features:
- Adjustment Layers: Apply color grading, effects, or exposure adjustments across multiple clips simultaneously.
- Nested Sequences: Simplify complex timelines by combining multiple clips into one.
- Masking and Tracking: Highlight or blur subjects selectively for cinematic storytelling.
- Speed Ramping: Adjust playback speed for dramatic or stylistic effect.
These techniques enhance creativity and visual storytelling.
11. Workflow Optimization
Efficient editing is crucial for meeting deadlines:
- Keyboard Shortcuts: Memorize commonly used commands for speed.
- Proxy Editing: Edit proxies for high-resolution footage and replace with full-quality files for export.
- Sequence Markers: Label important points for quick navigation.
- Template Projects: Save project structures for recurring types of videos.
A streamlined workflow ensures consistency and productivity.
12. Exporting Your Video
Export settings affect final quality and compatibility:
- Format Selection: H.264 for social media, ProRes for archival or high-quality delivery.
- Resolution and Frame Rate: Match sequence settings unless specific client requirements dictate otherwise.
- Bitrate Control: Higher bitrate ensures better quality but increases file size.
- Check Audio: Confirm proper levels and channel configuration before export.
Proper export ensures your video looks professional on any platform.
13. Collaboration Tips
For team projects, collaboration is key:
- Shared Projects: Enable multiple editors to work simultaneously.
- Media Management: Keep footage centralized and organized.
- Version Control: Save iterative versions to track changes.
- Cloud Storage: Use platforms like Adobe Creative Cloud for seamless team collaboration.
Effective collaboration prevents lost work and ensures consistency across projects.
14. Common Mistakes to Avoid
Avoid these pitfalls for professional-quality results:
- Overusing Effects: Effects should enhance, not distract.
- Ignoring Audio: Bad sound quality undermines good visuals.
- Rushing Color Correction: Consistency across shots is essential.
- Cluttered Timeline: Keep sequences organized to avoid confusion.
Being mindful of these mistakes improves workflow and final output.
15. Practical Tips for Chicago Videographers
Chicago offers diverse locations and lighting conditions:
- Night City Shots: Capture urban landscapes with stabilized footage and careful exposure.
- Event Coverage: Multi-camera setups for weddings or concerts maximize coverage.
- Indoor Studios: Controlled lighting facilitates color consistency.
- Outdoor Scenes: Use natural light creatively and supplement with portable LEDs.
Tailoring your editing workflow to local shooting conditions improves efficiency and quality.
16. Using Presets and Templates
Premiere Pro allows pre-built assets to save time:
- Lumetri Presets: Apply consistent color grading quickly.
- Transition Presets: Standardize fade-ins, wipes, and dissolves.
- Motion Graphics Templates: Reuse titles, lower thirds, or branded elements.
Presets accelerate production while maintaining a professional look.
17. Incorporating Feedback
Feedback ensures the video meets expectations:
- Rough Cut Reviews: Share early versions with clients for input.
- Annotations and Notes: Use markers for revision points.
- Iterative Adjustments: Incorporate feedback efficiently without compromising workflow.
Structured feedback improves client satisfaction and final output quality.
18. Exporting for Social Media
Different platforms require specific formats:
- Instagram and TikTok: Vertical video (9:16) with H.264 codec.
- YouTube: 16:9 resolution, high bitrate for clarity.
- Facebook: Optimize file size while maintaining quality for faster upload.
- Captions and Subtitles: Improve accessibility and engagement.
Platform-specific optimization ensures your videos reach audiences effectively.
19. Post-Production Finishing Touches
Final polish adds professional flair:
- Color Grading Enhancements: Adjust for cinematic consistency.
- Sound Design: Add ambient sounds, foley, or music for immersive storytelling.
- Motion Graphics: Refine titles, lower thirds, and animations.
- Final Render Checks: Review entire video for glitches, audio sync, or inconsistencies.
Attention to detail ensures the final product is broadcast-ready.
20. Conclusion
Editing in Adobe Premiere Pro is both an art and a science. By following a structured workflow—preparing projects, organizing media, mastering audio and video, applying effects, and exporting efficiently—videographers in Chicago can produce high-quality, professional videos.
Whether you are editing weddings, corporate videos, social media content, or cinematic projects, these step-by-step strategies provide a foundation for success. Mastery comes with practice, experimentation, and a commitment to continuous improvement.