Transitions and effects are powerful tools in video editing that shape the flow, mood, and overall impact of your videos. While shooting quality footage is critical, the way you move between scenes, apply visual effects, and enhance moments in post-production can make a video feel cinematic, polished, and engaging. For videographers in Chicago, understanding professional techniques ensures your content stands out in a competitive market.
This guide covers practical strategies, creative approaches, and technical tips to master transitions and effects efficiently.
1. Understanding Transitions and Effects
Before diving into software, it’s important to understand the types of transitions and effects:
- Transitions: These are methods for moving from one clip to another smoothly. Examples include cuts, dissolves, wipes, and fades. Transitions help maintain narrative flow and pacing.
- Effects: Visual or audio enhancements applied to clips, such as motion graphics, color effects, stabilization, and sound effects. Effects draw attention, emphasize moments, and create cinematic style.
Using both intentionally, rather than excessively, ensures professionalism.
2. Know Your Video’s Purpose
The type of project influences your approach to transitions and effects:
- Corporate Videos: Clean, simple cuts and subtle effects maintain professionalism.
- Music Videos: Creative wipes, speed ramps, and visual effects create energy and style.
- Weddings and Events: Smooth fades, cross dissolves, and soft color effects enhance storytelling.
- Social Media Content: Quick cuts, jump cuts, and dynamic motion graphics keep viewers engaged.
Tailoring transitions and effects to the content type enhances storytelling and viewer retention.
3. Cut vs. Transition
The simplest and often most effective transition is a cut.
- Hard Cut: Directly switches from one shot to another. Best for fast-paced or dialogue-driven scenes.
- Smooth Transitions: Dissolves, crossfades, and fade-to-black transitions create a cinematic, gentle flow.
- Contextual Choice: Choose a transition that supports the emotional and narrative tone of the video.
Cuts are underrated—they are clean, professional, and often more effective than fancy transitions.
4. Timing is Everything
Professional transitions rely on precise timing:
- Match Motion: Align the transition with camera movement or subject motion.
- Use Beats: For music videos, synchronize transitions with the beat.
- Scene Context: Avoid transitions that feel jarring or distract from the narrative.
- Experiment: Short, subtle transitions usually feel more professional than long, flashy ones.
Timing ensures transitions feel natural and enhances viewer engagement.
5. Layered Effects
Effects work best when layered strategically:
- Combine Effects: Use motion, color, and blur together to emphasize action.
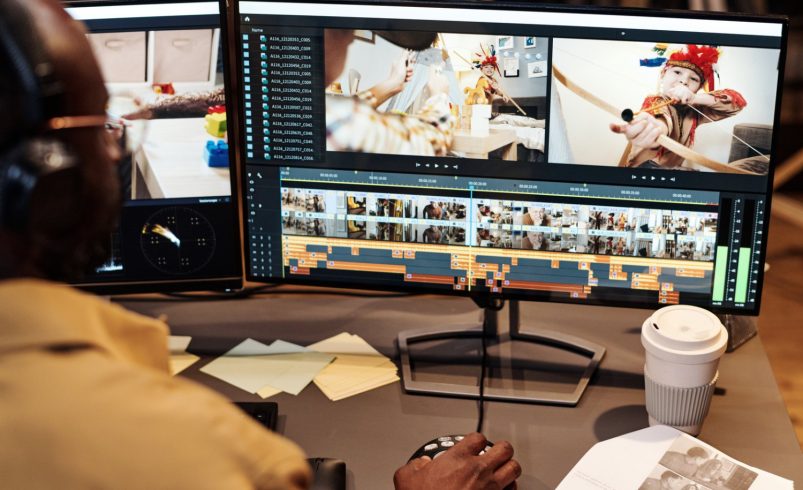
- Node-Based Workflow: In DaVinci Resolve, separate corrections and effects across nodes for flexibility.
- Adjustment Layers: Apply effects globally to multiple clips for consistent results.
- Avoid Overdoing: Too many effects can overwhelm the viewer and reduce professionalism.
Layered effects allow creativity without compromising clarity or pace.
6. Motion Graphics and Titles
Titles and motion graphics are essential effects:
- Lower Thirds: Add context without distracting from the main footage.
- Animated Text: Emphasize key points, dates, or messages dynamically.
- Callouts: Highlight objects or people with subtle animations.
- Consistency: Use the same font, style, and motion across all titles for professional cohesion.
Well-designed motion graphics elevate production quality.
7. Using Keyframes
Keyframes control effect timing and intensity:
- Animation: Move objects, zoom, rotate, or pan elements smoothly across the screen.
- Opacity Control: Fade elements in and out without abrupt cuts.
- Effect Intensity: Gradually apply effects like blur, brightness, or color adjustments.
- Precision Editing: Keyframes allow detailed timing adjustments for maximum impact.
Mastering keyframes gives complete control over visual storytelling.
8. Speed Ramps and Slow Motion
Speed adjustments are a popular effect:
- Slow Motion: Highlight dramatic moments or reactions.
- Speed Ramps: Gradually change speed for cinematic impact, common in sports or action sequences.
- Timing Alignment: Sync speed changes with music or dialogue for better flow.
- Smooth Transitions: Ensure motion is natural to avoid jarring playback.
Speed effects add emotion and drama when applied thoughtfully.
9. Color Effects and Look LUTs
Color effects complement transitions:
- Enhance Mood: Teal and orange for cinematic appeal, warm tones for intimate moments.
- Consistency: Apply the same LUT or color grade across clips to maintain visual coherence.
- Selective Color: Highlight specific objects or people for emphasis.
- Subtlety Matters: Avoid over-saturation or unrealistic tones unless stylistically intended.
Color enhances both transitions and narrative continuity.
10. Audio Transitions
Audio is just as important as visual effects:
- Crossfades: Smoothly transition between music or dialogue clips.
- Sound Design: Add subtle whooshes, hits, or ambient sounds to match visual transitions.
- Volume Automation: Adjust levels during transitions to avoid abrupt changes.
- Synchronization: Align audio effects with video transitions for professional impact.
A clean audio mix ensures transitions feel seamless and natural.
11. Masking and Layered Effects
Masking isolates areas for precise effect application:
- Focus Attention: Apply effects only to subjects, leaving backgrounds untouched.
- Dynamic Masks: Track moving objects with Power Windows in DaVinci Resolve.
- Layer Effects: Combine motion, color, and blur to enhance focus on key elements.
- Professional Look: Masks create cinematic depth and direct viewer focus.
Masking enhances both creativity and storytelling.
12. Templates and Presets
Using templates speeds up professional editing:
- Transition Presets: Prebuilt wipes, fades, and zooms save time.
- Effect Presets: Apply preconfigured color or motion effects for consistency.
- Reusable Graphics: Keep animated titles, lower thirds, and motion elements ready.
- Custom Libraries: Build a library of favorite transitions and effects for recurring projects.
Templates maintain quality while reducing repetitive tasks.
13. Avoid Overuse
The hallmark of professional editing is subtlety:
- Less is More: Use transitions and effects to enhance storytelling, not distract.
- Consistency: Avoid random transitions; maintain visual language across the video.
- Client Focus: Effects should support the message, not overshadow it.
- Refine Iteratively: Review edits with fresh eyes to ensure professional impact.
Subtle, purposeful effects always feel more polished than flashy, excessive ones.
14. Combining Effects with Cuts
Professional editors balance effects with traditional cuts:
- Cut First, Effect Second: Ensure the narrative flows before adding visual enhancements.
- Enhance Not Replace: Effects should emphasize, not mask, weak footage.
- Layer Timing: Sync effects precisely with cuts for seamless transitions.
- Review Context: Watch the sequence in full to ensure flow and impact.
Combining cuts and effects thoughtfully creates a natural, cinematic feel.
15. Experimentation and Creativity
Professional editing also requires creativity:
- Test Ideas: Try different transitions or effects to find what works best.
- Blend Styles: Mix classic cinematic transitions with modern digital effects.
- Stay Current: Watch trends in social media, commercials, and films for inspiration.
- Controlled Risks: Creative experimentation can yield unique, memorable content.
Experimentation keeps your editing fresh and adaptable.
16. Export and Review
After applying transitions and effects, export for evaluation:
- High-Quality Export: Maintain resolution, bitrate, and color integrity.
- Check Playback: Review on multiple devices and screens.
- Client Feedback: Share drafts for input on pacing, effects, and transitions.
- Final Adjustments: Tweak based on feedback to achieve professional polish.
The final review ensures every effect enhances rather than distracts.
17. Software-Specific Tips
Popular editing platforms have unique strengths:
- Adobe Premiere Pro: Excellent for timeline-based transitions and motion graphics integration.
- DaVinci Resolve: Industry-leading for color effects and node-based compositing.
- Final Cut Pro: Optimized for fast editing and smooth real-time effects.
- After Effects: Perfect for advanced motion graphics, visual effects, and compositing.
Choose software suited to your style and project requirements.
18. Efficient Workflow Strategies
Speed and professionalism go hand-in-hand:
- Keyboard Shortcuts: Save time applying effects and transitions.
- Adjustment Layers: Apply repetitive effects globally.
- Proxy Files: Edit smoothly with high-resolution footage.
- Organized Projects: Maintain bins, sequences, and markers for clarity.
A structured workflow ensures that creative efforts are executed efficiently.
19. Common Mistakes to Avoid
Avoid these pitfalls when applying transitions and effects:
- Excessive Effects: Overdoing effects can make videos look amateurish.
- Misaligned Audio: Effects that aren’t synced with sound reduce impact.
- Inconsistent Style: Random transitions confuse viewers.
- Neglecting Narrative: Effects should support the story, not overshadow it.
Professional editing balances creativity with narrative coherence.
20. Conclusion
Transitions and effects are vital tools in professional video editing, shaping both the flow and emotional impact of your content. By understanding their purpose, timing, and application, Chicago videographers can produce polished, cinematic videos that captivate audiences.
From subtle crossfades to complex motion graphics, the key is intentionality. A thoughtful combination of cuts, transitions, effects, and sound ensures that each element serves the story, not just visual flair. Mastery of these techniques elevates your projects, making them feel professional, engaging, and ready for any platform—whether corporate, wedding, social media, or cinematic film.